HomeFree Video TutorialsFairy School TutorialClasses

Showing posts with label mixed media. Show all posts

Friday, September 21, 2012

Making a Journal for Healing


I have had a pleasure creating my own journal this past week!
Yay!
I have always wanted to make one from start to finish!


I began with some scrapes of quilt I had dyed ages ago...lovely colors that make me smile...


My inspiration came from a class  I have been taking with Misty Mawn...
she is a sweet, very creative woman.
I adore her, and her classes. 

I had made a few small bound books before...but had not felt so free to create a journal from scratch!
Misty has a class on creating a journal (as well as many other classes)
And her class really gave me confidence that I could make one!
(and just so you know, the steps I show here are not from her class, just my playing around)

And I will admit, I fudged it, and went along and just made it...
without really thinking or following instructions!!!
( I do think Misty would like that! Lol!)


Gosh it is fun to play!

I painted the two layer piece of fabric with gesso, hoping to toughen up the spine...


I created 4 signatures in hopes that I will have enough pages to express on...


Then I did sewing of sorts to get each signature tight to the spine. 


I am hoping my sewing will hold strong!

Embroidery is not really in my repertoire...but I gave it a go, it looks pretty 60's ish to me...
but hey, that is part of my childhood...I guess it came out here : )


Some projects are just so enJoyable!
Now to be brave and face the first white blank page...take out my gesso, papers,
images, paints and stamps and start my journey : )

How is your creative week end going?
I have had some issues lately getting on to some of your blogs.
Sometimes it says I need to have permission?
I think it may have to do with Google +
Have any of you had this issue?

Hugs,
Terri

Friday, September 7, 2012

Mixed Media Faery School Tutorial!


Hello All!
I wanted to give you all a gift for the new year.
So these past few days I have been working on the first of 3 videos to create a Mixed Media Faery School.

I made one earlier this year and posted about it. You can see it here.

In video #1, I demonstrate how to make the inside and outside of the school from a shoebox. The second video will be making Faeries and the 3rd will be creating the furniture and accessories. This is so much fun! All videos will be done withing 2 weeks, so if you want to make one you will have all 3 videos to watch very soon.

For me, the most exciting part of creating something like this is using my imagination to plan what the school should look like, what the faeries should wear, and what kind of things they would do in school. It is like telling a story, and I love to tell stories!

You can make the exact same one as mine with the notes I have written out. I share everything I used to make it. I did use a number of digi sheets from Paperwhimsy, and a scrapbook sheet from 7gypsies as well. The rest you can pretty much find at your own home. If you click on the link you can download a set of instructions and supplies.

Download Here

A word about PaperWhimsy....I mention them so often, it is because they have the most amazing images available: women, children, faeries, botanical, butterflies, birds, whimsical images, backgrounds, digi images..... They are crisp and clear and the variety is endless. They also are owned and created by absolutely amazing people. Paperwhimsy has an online forum as well, where you can meet other artists and share in swaps and projects. It is a really fun place to be. Paperwhimsy was the first place I found when I got "online" a couple years ago.


You can also, of course, make the school and accessories from papers, images and paints, scrap bits of wood.... you already have.
You could use dictionary or phone book paper, old cards, images from a magazine....photo copies of your own vintage ladies and children....there are no limits here!
Create an entirely different looking school! I would love to see that too.

What a fun project for the faery lover in you, for you and your daughters, and granddaughters....and boys too of course!

If you create one and would like to share, I would love to see what you have created and I will post it on my site to share with my wonderful visitors! Yea!

Thank you so much for stopping by!
Hugs,
Terri

Wednesday, March 21, 2012

Creative Play


Hello All!
What a week of delightful weather!
I am loving the thunderstorms. 
I am enjoying the sweet smelling blooms of springtime.

This week in between soldering sessions, I have had some time to just play. 
 And it feels really good.

I wanted to spend some time trying to express myself through collage. 
The collage above is one I am working on about my sister Kathleen and I.
It measures about 6x9'' (you are seeing only a small part of it) and I have used acrylic on cardboard.
I have more to say in it and will keep looking at it and tweaking. 
The fun part!


Here is another project sitting on my very large (and yes messy!) art desk....the beginnings of a domino book about one of my favorite women of history, Beatrix Potter. 
It has a ways to go yet. I am in the process of gathering things of meaning about her.

And I am still soldering! I am beginning to improve and to be more consistent!
Yay!
I had taken a few photos tonight but they did not turn out well, so tomorrow I will try to get some photographs to share with you all.
I do love learning new things!

I want to thank you all for your visits and very kind comments. I love hearing from you all, how you are doing and what you are doing creative in your life. 
Creativity is a part of my wellbeing....
Is it the same for any of you?

Hugs,
Terri

Sunday, October 9, 2011

Memory Book of Grandmother


Hello All!
 The opening of my new mixed media class on Altered Domino Books starts tomorrow!!!
O.k. can you tell I am excited about this???
You should see the grin on my face! 

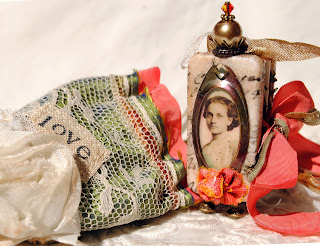
I wanted to share with you a domino book I made as a memory holder to my grandmother. 
I only have a few blurry photos of my grandmother, so I chose an old vintage one that I thought resembled her the most and I crafted this little book that holds many happy memories of her for me.

I used each panel to depict something that I thought was particular special about her and our childhood.
One of my favorite memories is of her teaching us how to feed the birds in the backyard. We would save the crusts of our toast and put it out for them to have for breakfast. So I used the last panel to remind me of this.


And on the back of the pages I wrote out a thank you to her for all the happy experiences I had at her home when I was a child. 

I do miss my grandparents. I have very good memories of staying overnight at their home. 
I am very thankful for those memories!
You may have noticed that I changed the bead color from the first photo, I was happier with the gold pearl. I also stitched a little lace bag from vintage lace and silk to keep it in.

I also want to thank Gail at Creative Workshops for giving me an opportunity to teach what I love online!
Thank you Gail!

Thank you so much for stopping by!
Hugs,
Terri

Thursday, October 6, 2011

Gothic Arches and Halloween Fun


 Hello All!
How are you all doing so far this week?
I hope it is a good one for each and every one of you.
I will be picking the winner of my Domino Book Kit tomorrow night! Yay! I wish each of you luck.

If you have not yet entered to win, just go to THIS post.
Make sure you leave info on how to reach you if you win.

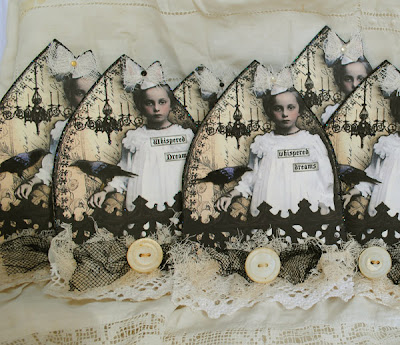
I have had a few moments to play and created these Gothic Arches for a swap over at Paperwhimsy.


Creating is such an enjoyable venture! I was thinking today about how young I was when I first realized that making things from paper is my favorite thing to do...and I had a memory of sitting at the kitchen table cutting out paper dolls the way my grandmother taught my sisters and I, I think I was about 6 or 7 years old.
I still love making things with paper!

I have been out and about in Blogland and was unable to comment on some blogs.
Just know, I do love to visit you!
Hugs to you all!
Terri

Friday, September 2, 2011

Fun with Purples and Greens

At the Paperwhimsy Forum (a totally fun place to be!), we have just finished a fabulous swap. The theme was Sassy and we were to decorate a 81/2 x 11" envelope and then fill it with art supplies from our own stash. Then, send it to our secret Sassy Sister. Once everyone had there envelope of goodies, we were to create a Thank You ATC to send back to the sister who sent us the supplies. Totally fun!

Meet the "Sassy Sisters". There is Sassy One, Middle Sass and Lil' Sass. They are the cutest little girls....but my oh my are they sassy! I dyed the laces that Christine, my Secret Sassy sister sent me, and I used her green and gold paper background as well as her little girls for the ATCs. I decided they needed stitching in place and used gold, purple and green threads.

The papers she sent me worked so well together...even though she did not send me anything purple, that just kind of evolved.

Lil' Sass is really sweet looking....but watch out, her bite is much worse than her bark!

I had not made any ATCs for a while so this project was really enjoyable.

Here is the fantastic envelope that Christine created for me, along with some of the goodies she so generously sent too!


A close up of her decorated envelope. It was hard to capture the fab texture on the blue.

(My return gift to Christine, with the 3 ATCs)

Thank you so much Christine! I really appreciate what you sent me!
Thank you Paperwhimsy for yet another creative swap!

I hope you are all doing well this week. It has been a very busy week here.
I am working on a new venture and I will share about that soon!
Hugs,
Terri

Sunday, August 7, 2011

Time to Play!

(Best journal I have found for mixed media)

Hello all,
What a summer it has been!
Hot, Hot, and more Hot here in North Carolina. It was wonderful to get a break while in the UK and I just returned from my home state where it was much cooler and such a treat!
My travels are done for a little while so I am now able to get back into the art room and have some fun!

My friend Jan and I are doing the She Had Three Hearts class over at Scarlet Lime. I have been wanting to art journal for ages and now I am getting the opportunity to do so...and, the best part...share it with a friend!
The alphabet stamp set I used here on the cover of my journal is "Artsy Alphabet" by Crafty Secrets. I just received this fab set and I love it!
I am just in the beginning...playing with paints, layers, textures and embellishments....
So far I am having a great time!


Here is the front of a board book I am working on for a friend....it has been such fun to work on as well, lots of paints, stamps, paper and beeswax.
While I was away visiting family, my dear hubby had this wonderful sky light put in my art room, now I have gorgeous light all day long!
While on my way home from my family, I stopped at a antique store and found this old Excelsior sign and price stamp set! What a find!
It is going to be fun to use in my journalling.
I also found this beauty. She is about 6 inches tall, and I am dreaming of what to create with her.
I have also had a chance to catch up with many of your blogs. I am able to comment on most posts, but sometimes I am blocked. Just know I have been by for a visit.
What are you doing this summer?
Hugs,
Terri

Sunday, July 3, 2011

Freedom


Happy 4th of July!


The holiday to celebrate FREEDOM!

And, for me, giving thanks for that freedom.

To celebrate, I sat down in my art room this morning and created a little symbol of the holiday. The early morning sun was shining in my window, and I worked quietly as others in my home were still resting (the early bird having woken me at 6:30am!).

Here is my little Freedom Flag...


I created it using copy of a rough draft of the Declaration of Independence for the flag.


I didn't have small enough letters, so I stamped my own using a Martha Stewart stamp set, I also used diamond glaze and some fine white glitter on them.


I then fan folded a strip of 1'' by 8 1/2'' paper, then pulled it into a round and glued it to the paper card stock circle.


I inked all the light colored papers with a brown ink pad.

I cut out red card stock a little larger than the printed flags, and pinked the edges. Then I glued a small ruffle of crepe paper at the top before sewing the front to back with red thread on baste.


After stitching the two sides together, I used fabric glue to glue on the red rickrack. I did try sewing it, but it is so tiny and narrow that I couldn't get it to hold still long enough!
Next I glued on the paper ruff all decked out with the circle and letter, added a blue star at the base and it was done. Yay!


Here is a copy of the page I created for the flags and the circles, just in case any of you would like to make your own little Freedom Flag. Just click on it to enlarge and then right click and do a "save as" to your own computer.

Have a fabulous 4th!
Hugs,
Terri

Tuesday, June 14, 2011

Tissue Paper Transfer Video!


Hello All!
Today I am sharing with you my newest video. Tissue paper Transfers! Yay! I love creating with these transfers, the variety of images are endless and can be used in all types of projects. You can used them for backgrounds, for layers, for cards, tags, to cover boxes...all kinds of ways. Below is an ATC card I made using a tissue transfer image in the background. I took the images from an vintage women's magazine.


Since creating this video I have realized that I can rub a bit of black Stazon ink on one side of the transparency, just a light coating, and then the printer is able to "see" it better. No need for the extra copy paper sheet. Remember to seal your tissue paper after you print it, both sides. This helps to stop bleeding of the ink when you adhere it to your art work with glue or gel medium. Even then, be careful as you apply it not to rub too much. Test out a little piece of your transfer first, just to see how set the ink is.


Hugs to you all!
Terri

Saturday, June 11, 2011

More Fun with Dominos! Mixed Media delight!

Hello Every One!
Happy Saturday!
What a beautiful day to enjoy being alive and being creative.
I have been working on several projects and today I am sharing with you another domino book. I call this an upgrade as I have been able to figure out how to add more elements.

I have added some glam by edging the domino with rhinestones, and golden wings on the back. This book is also footed with 4 brass beads. The lovely girls are from my favorite shoppe at Paperwhimsy.com.

The script and flower images are also from Paperwhimsy.com

Sweet Friendship!

There is a key on the side along with some bead charms.


I have a Tissue Paper Transfer video all done and ready to come out, hopefully tomorrow. I am working on two others, a new tissue paper flower video and a domino book video (that is taking much more time to create).

My Happy June Giveaway continues and I will be adding another item to the giveaway tomorrow. If you would like to sign up for one of the first two prizes or both ( Yay!) click here and here.

You only need be a follower to enter to win. You can sign up for as many of the prizes as you fancy. I am so thrilled to have this giveaway to thank you all for your company here at Artful Affirmations. The prizes will be awarded at the end of the month. I wish you all the best of luck!

What are you creating this weekend?
Hugs,
Terri
Related Posts Plugin for WordPress, Blogger...